First, prepare your background picture, if you cannot create one, ask our artists on the forum, they'll be more than happy to help you, maybe for some clicks or a trade
Once your background is ready, host it on a website like imageshack, servimg or photobucket.
Now go on your game file (click profile on the top bar) and click on the purple pen to edit your presentation.
You'll land up there : (sorry the pictures will be in french, I'm using Calie's, I haven't made my own, text might be different, icons remain the same at the same place)
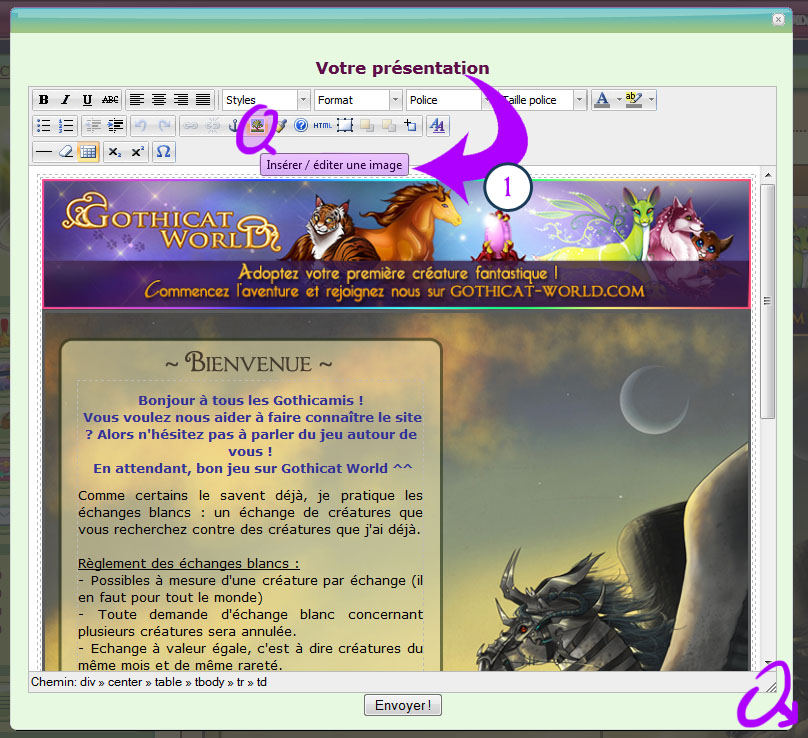
1 - Click on "insert/edit a picture". If more convenient for you, you can enlarge the pop up by clicking on the grey triangle in the bottom right corner (circled in purple in the picture below)
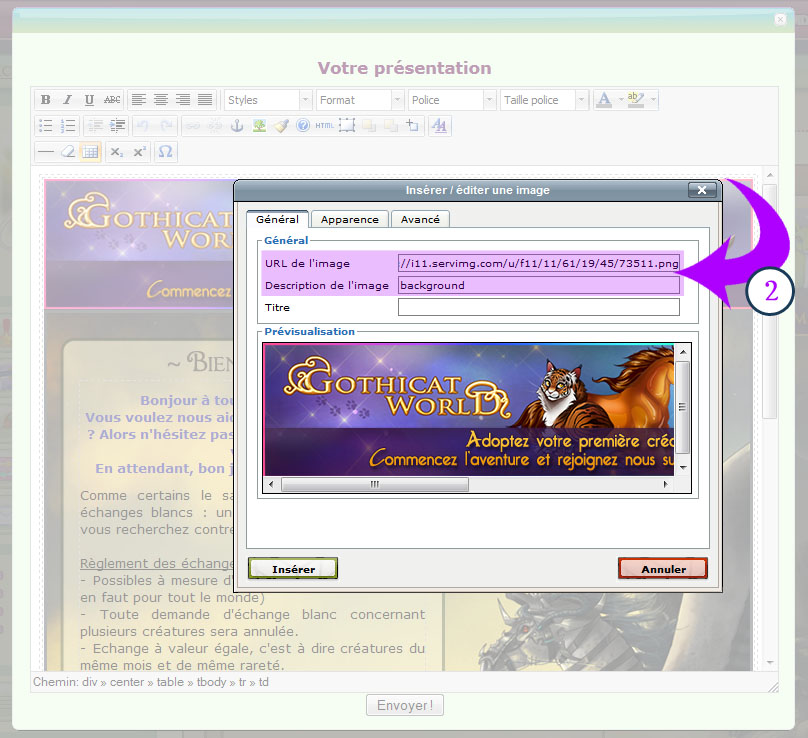
2 - Paste the address of your picture and give it a name (optional)
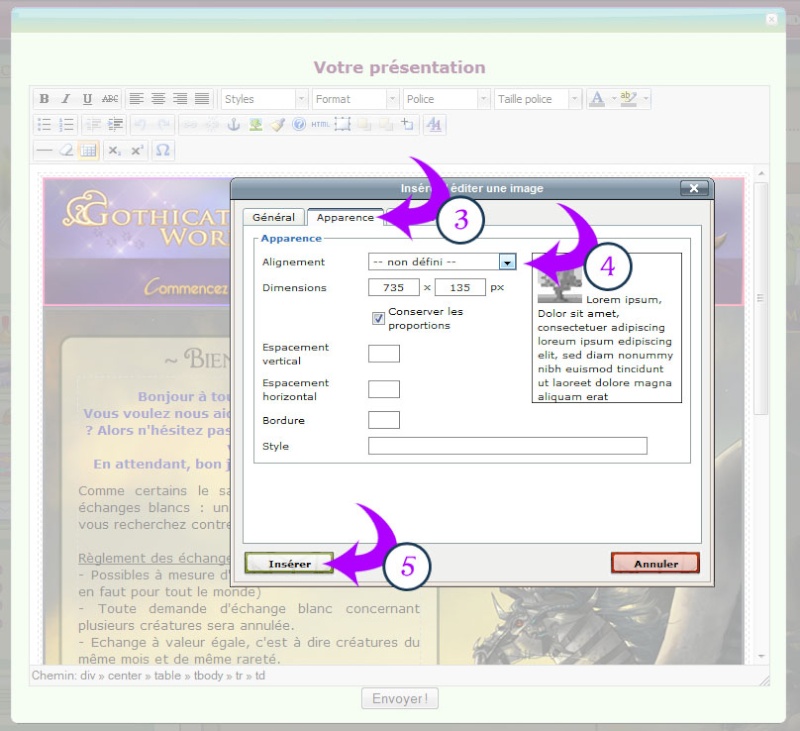
3 - Click on the tab "appearance" (might be "layout"?) to adjust the settings of your image.
4 - select the alignment option "undefined" and be careful as your picture cannot be over 729 pixels wide. If it's bigger, select the correct 729 px size by ticking the option "respect the dimensions" (this way your picture will not be distorted)
5 - validate by clicking "insert"
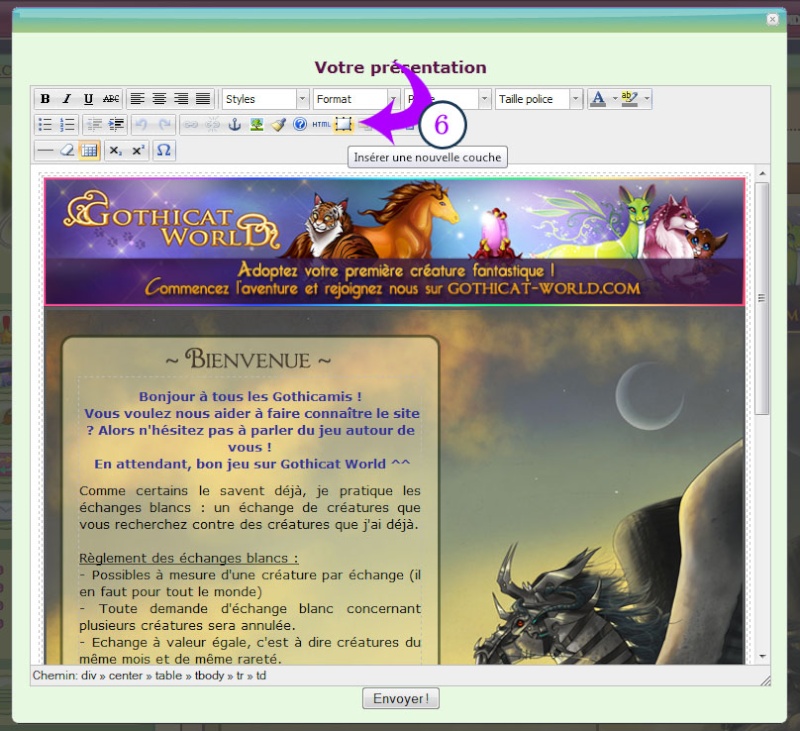
6 - Click on the icon "insert a new layer". This will create a layer in which you can insert text above your image.
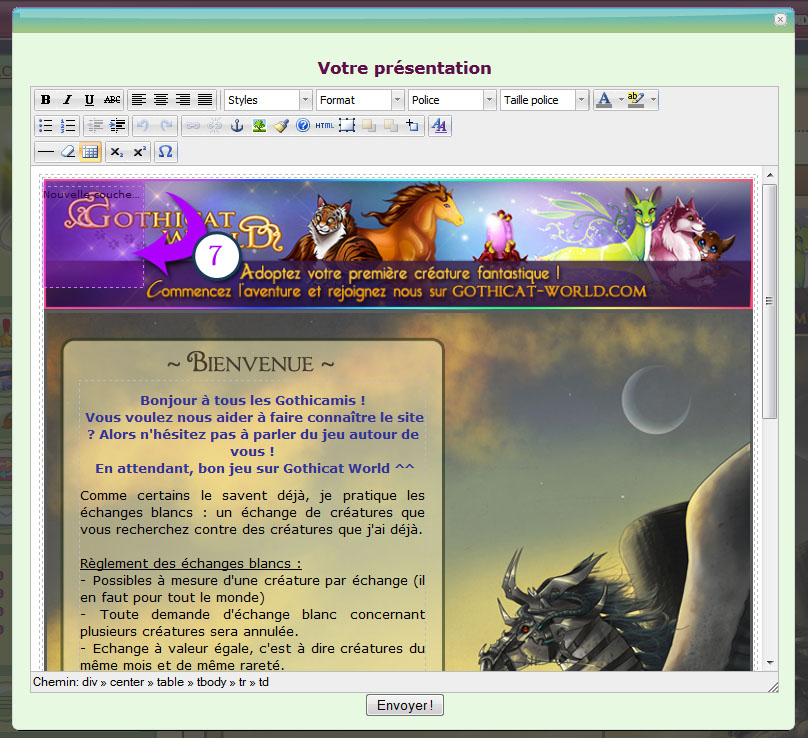
7 - a frame appears in the top left corner of the edition window.
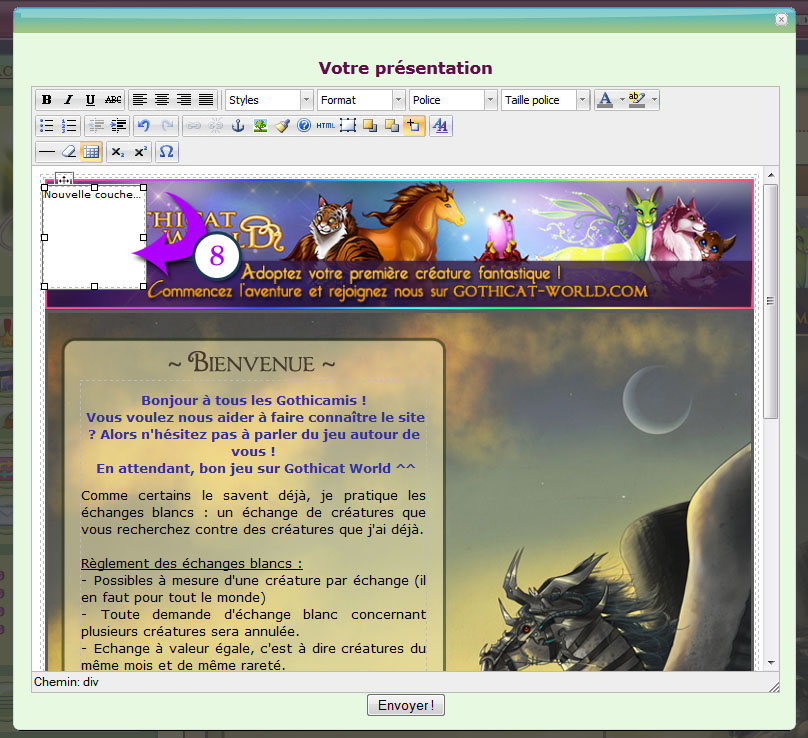
8 - Click inside this frame to make it appear in white.
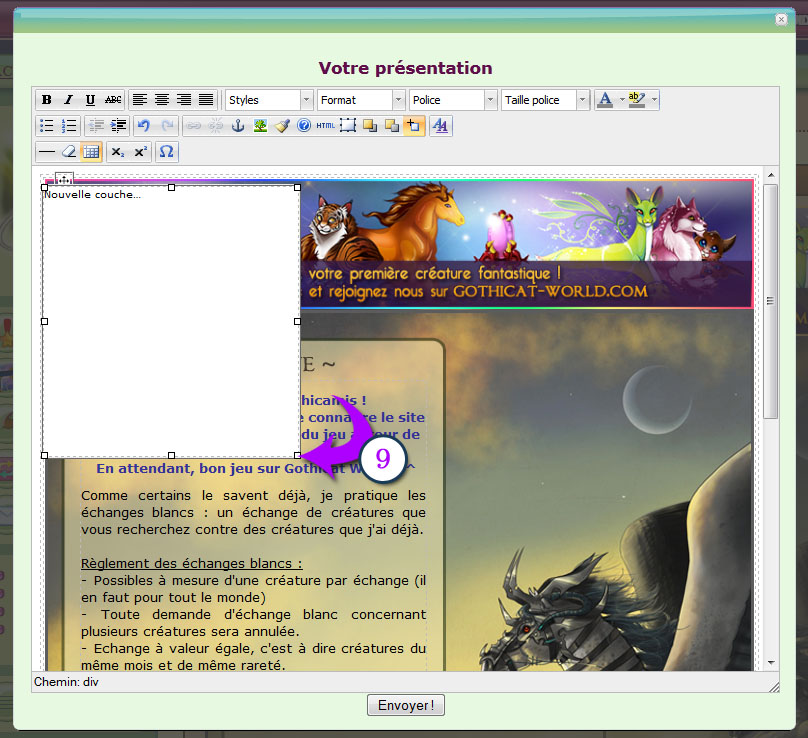
9 - Customisation of the shape and place of the text layer:
- - click on one of the little squares that appear in the corners of the frame to enlarge your text zone to the desired size.
- then move your frame by sliding it around with the little square located on the top left of your layer (indicated by the arrow 10). Slide your layer where you want it to be.
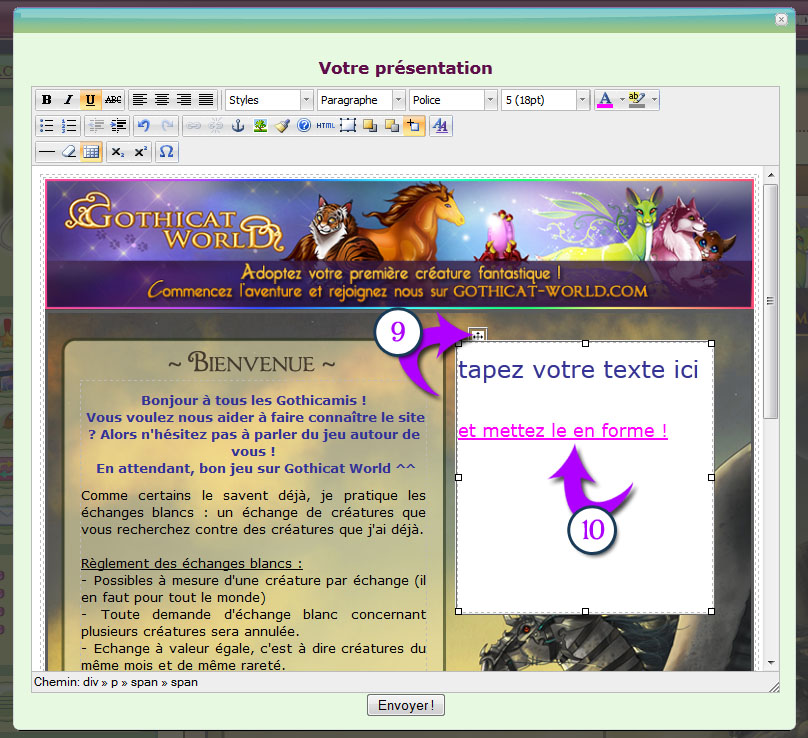
11 - Click once out of your text zone to have a preview of your work so far.
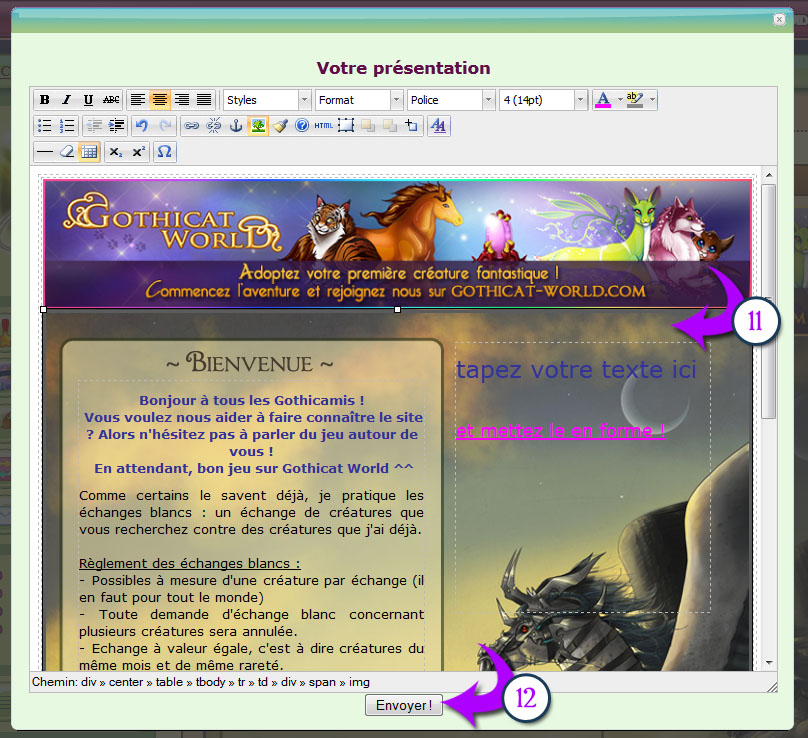
12 - Click on "send" to update your gamer file.
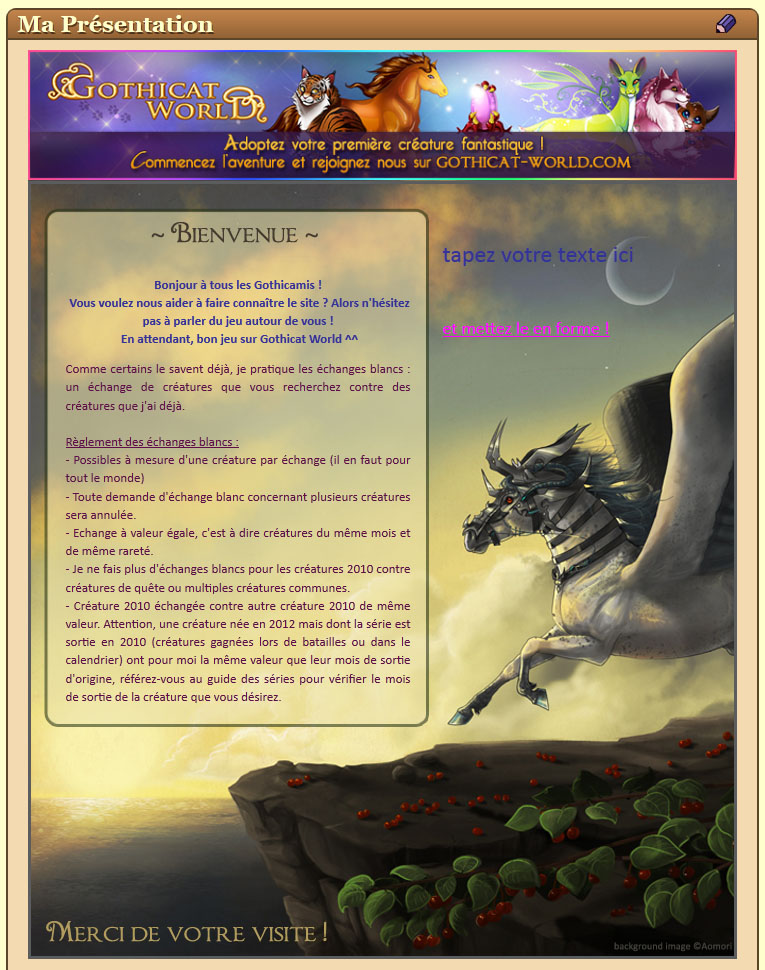
And here is the final result: